To configure OnesID to work with WordPress, 3 steps are important:
- Register the device your WordPress installation is running on, with IDP
- Install and configure the WordPress plugin
1.0 Register the server
To register a new server, you need to have px-device-identity.
To install it:
- make sure you have at least Python 3.10
- are logged in as root
pip3 install https://source.pantherx.org/px-device-identity_latest.tgz

# on some systems, you need to add a flag --break-system-packages, or install in a venv
# pip3 install https://source.pantherx.org/px-device-identity_latest.tgz --break-system-packages
After everything is installed, register the server.
- Adjust “ServerName” easy to recognize
- Adjust “Bangkok” to the server location; for ex. City
px-device-identity -o INIT -a https://idp-server.ones-now.com -dn onesid1.com -t "ServerName" -l "Bangkok" -r SERVER
Someone from the OnesID team will need to approve this request this request within 300s.
2.0 Install the WordPress plugin
- Download the ZIP
https://s3.eu-central-1.amazonaws.com/temp.pantherx.org/ones-auth_v0.3.0.zip - Upload it to WordPress (Add new Plugin, Upload ZIP)
- Activate it
- Update the settings
Important settings:
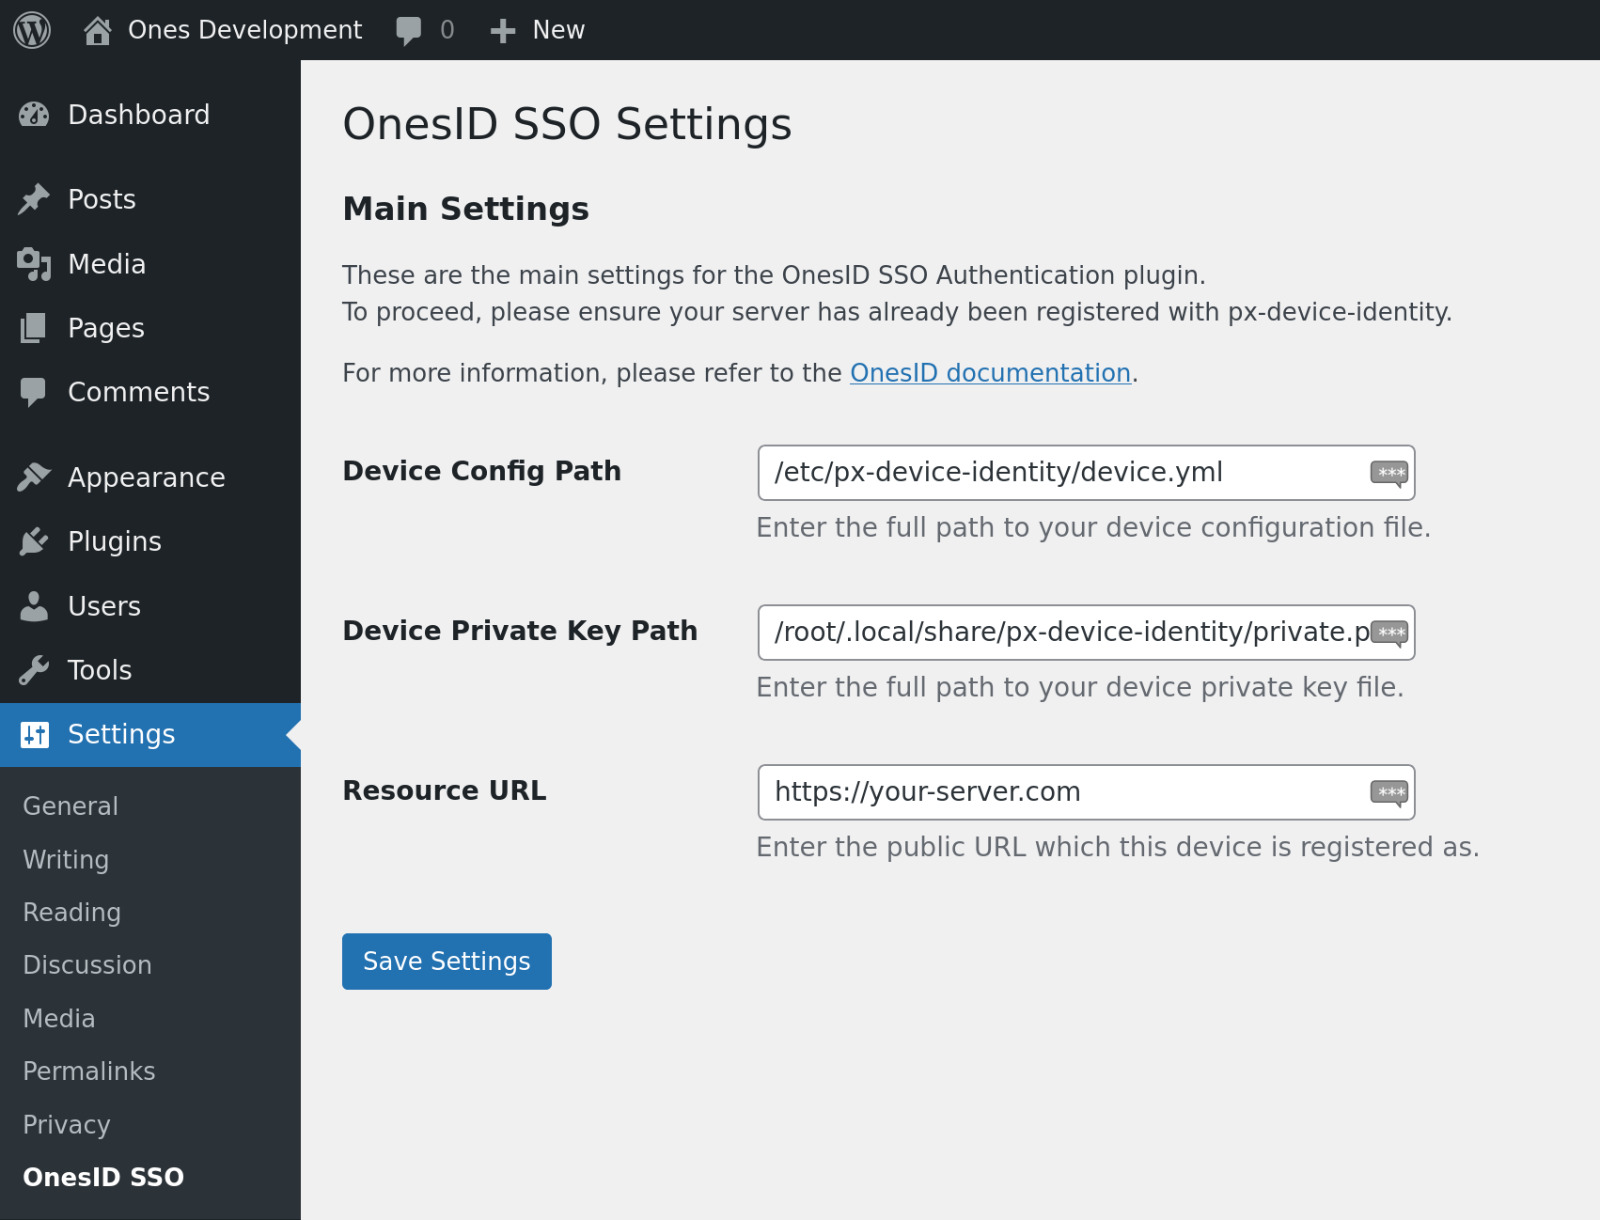
1) Device Config Path
- By default, this is at
/etc/px-device-identity/device.yml - Make sure, the file (or a copy of the file) is accessible to the WordPress installation
2) Device Private Key Path
- By default, this is at
/root/.local/share/px-device-identity/private.pem - Make sure, the file (or a copy of the file) is accessible to the WordPress installation
3) Resource URL
- This is the URL at which your server is reachable, and registered on IDP
- If this URL is not registered with IDP, login will fail
4) Enable CONSENT flow
- When enabled, users will be required to confirm their signup (new account) with a consent prompt on OnesID
- An new account is only created, if the user approves the consent request